Bootstrap 5 and Visual Studio Code in 10 Minutes

Visual Studio Code is a code editor that is optimized for building and debugging modern web applications. It is open source and boasts a large community of developers who are constantly producing excellent extensions that increase productivity.
Bootstrap 5 is the newest version of Bootstrap, which is the most popular HTML, CSS, and JavaScript framework for developing responsive, mobile-first websites.
Download Visual Studio Code
Proceed to Download Visual Studio Code and acquire the version that best suits your Operating System. The installation station is fairly straightforward and you can go ahead and click next until completion.
Setup Web Project
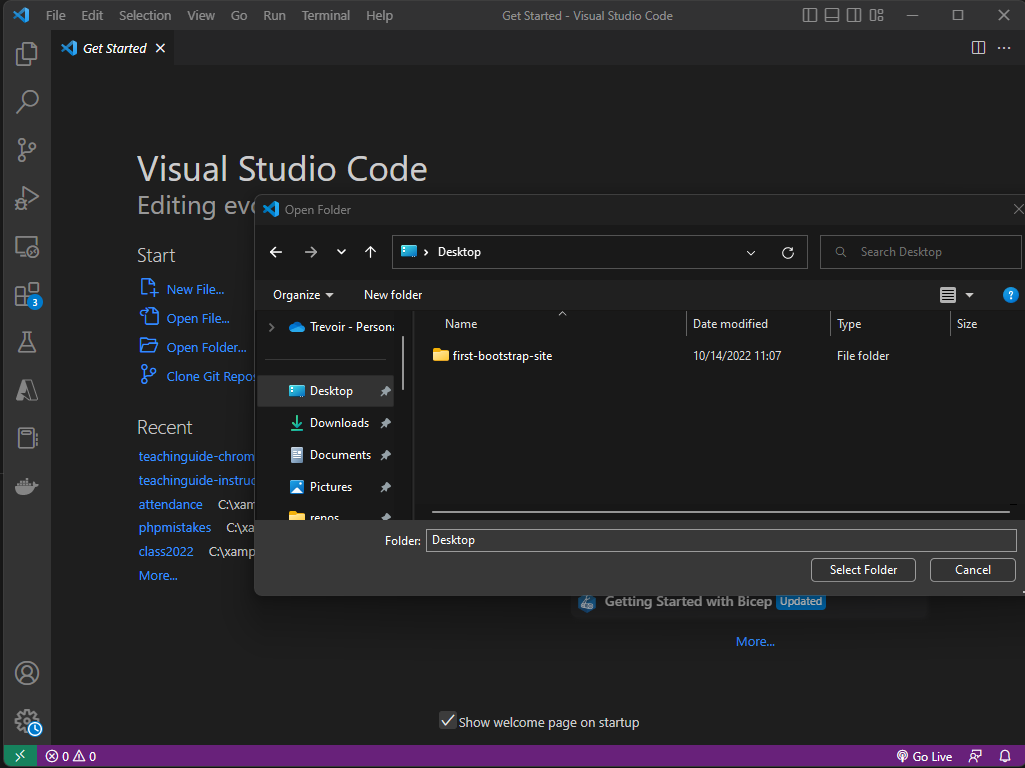
- Create a Folder on your desktop and call it *first-bootstrap-site*. It is always recommended that you avoid using spaces and most special characters (- and _ are allowed) when naming files and folders in web development.
- Open Visual Studio Code (if not already open). Go to File -> Open Folder -> Find first-bootstrap-site on Desktop -> Select Folder
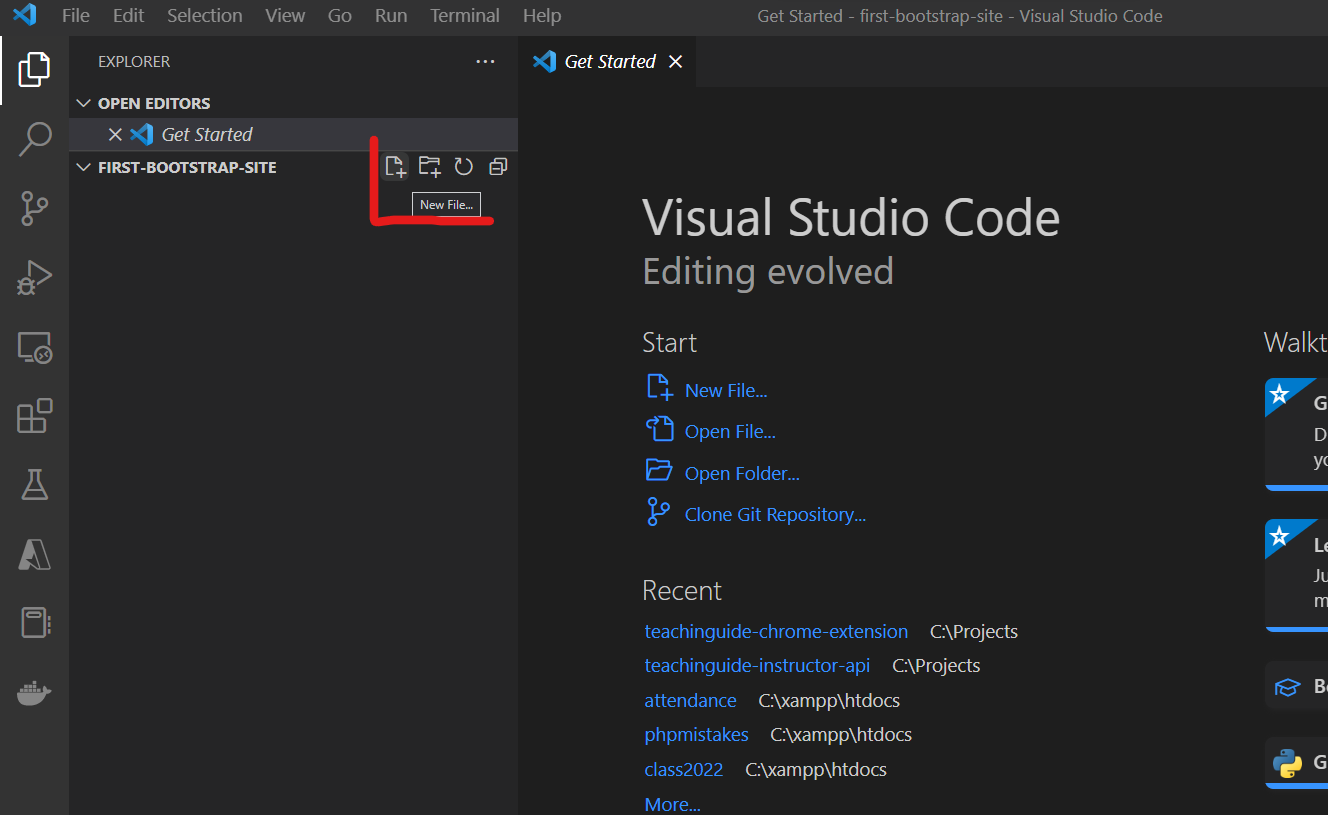
To the Left, you will see a Pane called EXPLORER. Under this Pane, go ahead and create a new file and name it index.html. Please note, every time you start a website, the first file almost always should have this filename. It will save you a lot of headaches and troubleshooting time in the future.
Install Useful Extensions
Extensions exist to help us as developers move more quickly in our environment and get more done in less time. We can browse available extensions by visiting the Extensions pane to the left side of the IDE window.
From here we can search for the extensions we wish to install. Let us proceed to find and install the following plugins (you may be required to reload VS Code after installing each):
- Bootstrap 5 Quick Snippets - Collection of Bootstrap 5 Snippets that will make your life easier. Just start typing bs-
- Live Server - Launch a development local Server with live reload feature for static & dynamic pages
Add Bootstrap to Our Page
Now we get to see the full power of Visual Code and these extensions. let's go back to our Explorer pane and open index.html. It may still be open, so you can select it from the already open tab at the top of the IDE Window.
Type the text b5-$ in the first line of the document and press enter when the autocomplete suggestion appears. If this auto complete bar disappears, hold down CTRL and press Space Bar to make it come back.
This will populate your page with a beautifully bootstrap HTML Page Skeleton. All the essential HTML tags will be generated alongside already included CSS and Javascript files needed to have Bootstrap 5 capabilities on your page. Let's do the following:
- Change the text in the title tag to
<title>My First Bootstrap Page!</title>
- Add the following code after the opening body tag
    <div>
        <h1 class="display-1">Hello, world!</h1>
        <p class="lead">This is a simple bootstrap 5 website that I am developing</p>
    </div>
The Bootstrap CSS Framework gives us a whole host of ready made CSS styles that we can access by applying the relevant class to out HTML tags. Above will produce a pre-style display on our page, without much design effort on our part.
Preview with Live Server
Now we will preview what we have done. Right Click index.html -> Click Open With Live Server
This will launch your default browser and begin to display your newly created Bootstrap 5 Web Page.
Going Forward
All pages that you create beyond this point, can be created using similar steps. You would have already installed your extensions and they will remain until you have either removed them, or removed Visual Studio Code altogether.
For the Full compliment of the Power of Bootstrap 5, you can check their official website.
If you want to learn web development from scratch using modern tools and techniques, check out the course Introduction To Website Development Technologies.
By the end of this course, you would have learned:
- How to create HTML Documents
- How to link HTML Documents and create a website
- How to insert elements in an HTML document (images, lists, tables, text, etc.)
- How to style one or more pages with CSS (Inline, Internal and External Style sheets)
- How to upload code to GitHub.
- How to publish your static website to the internet using Netlify.
- How to design a form to collect data.
- How to write JavaScript and jQuery
- How to use Bootstrap 5
I hope you enjoyed this exercise. Have Fun!
Member discussion